Your shopping cart is empty!
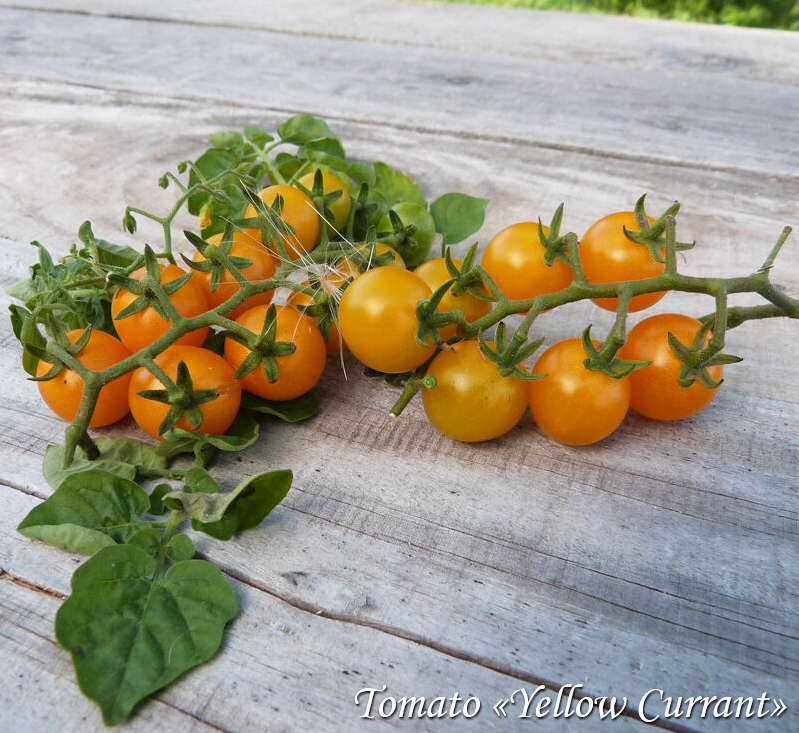
Tomato "Yellow Currant"

Eco seeds

Solanum pimpinellifolium L.
3.65€
Ex Tax: 2.95€
Ex Tax: 2.95€
Tomato "Yellow Currant" - Solanum pimpinellifolium.
A flavorful mini-tomato and an excellent rootstock!
Maturity: Mid-season
Weight: 2–4 g
Shape: Round
Texture: Dense
Plant Type: Indeterminate
Color: Yellow
Plant Height: 150–200 cm
Fruit Size: 1–2 cm
Tomato Type: Wild Cherry / Currant
Foliage: Regular
History: Domesticated in Mexico, this variety belongs to the species Solanum pimpinellifolium and is closely related to one of the original wild tomato species still found in northern Peru.
Like the famous "Petit Moineau" tomato, the "Yellow Currant" variety belongs to the wild species Solanum pimpinellifolium. It is highly productive, forming numerous long trusses filled with 6 to 10 tiny, juicy yellow fruits. They possess a delightful sweet-and-sour flavor, making them ideal for salads or as a fresh snack.
The "Yellow Currant" tomato exhibits exceptional vigor and a powerful root system, making it an outstanding rootstock perfectly suited for improving the disease resistance and yield of other tomato varieties.
How to sow "Yellow Currant" tomatoes?
Sowing seeds begins indoors in a warm location between February and April, depending on your climate and growing conditions (greenhouse or open ground). The ideal sowing date is usually 7 or 8 weeks before transplanting, once the risk of frost has passed in your region.
Fill a seedling tray, flat, or individual pots with pre-moistened seed-starting mix and press down lightly.
Place one seed in each cell or sow thinly in a tray and label with the variety name.
Cover with a 3-5 mm layer of potting mix.
Water with a spray bottle or place the seedlings on a water tray so that moisture is absorbed into the substrate by capillary action.
Place the seedlings near a heat source until germination occurs.
Then, move them to a bright location as soon as the first cotyledons appear to prevent the young plants from stretching. Transplant (prick out) the seedlings into individual pots a week after germination when the cotyledons are well visible, and keep them warm.
Later, after the risk of frost has passed, you can plant them out in the garden, spacing them 50 cm apart.
Why use this tomato as a rootstock?
Grafted tomatoes combine the best qualities of both varieties. Generally, the vigorous growth, robust root system, and disease resistance of the rootstock tomato are paired with the superior taste qualities of the scion tomato.
The wild "Yellow Currant" tomato is distinguished by its superb vigor and good resistance to certain soil-borne diseases and drought. Because of these advantages, it is suitable both for growing its own delicious mini-fruits and as a reliable rootstock for other, more fragile or sensitive heirloom varieties.
How to graft tomatoes?
There are many different grafting techniques: approach grafting, cleft grafting, Japanese (tube) grafting, etc., each with its own pros and cons. While the Japanese method is the fastest, it requires maintaining very specific temperature and humidity conditions that are sometimes hard to achieve at home. The approach grafting technique described below, although a bit more time-consuming, generally provides the best and most reliable results in less stable environments.
To perform this procedure, you will need a sharp scalpel or razor blade, grafting clips, a disinfectant, and a large transparent container (propagator):
sow the scion seeds (the cultivated variety) a week before sowing the rootstocks (since the wild currant grows faster);
perform the graft when the seedlings have 3-4 true leaves, about a month after the initial sowing;
transplant the rootstock and scion seedlings closely together into the same pot (make sure to clearly label each plant);
disinfect all your tools (scalpel and clips) as well as your hands;
make a downward 45° cut (tongue) on the stem of the rootstock just below the first pair of true leaves;
carefully make a matching upward 45° cut on the stem of the scion at the exact same height;
interlock the cut on the rootstock with the cut on the scion, ensuring the best possible tissue contact between the two plants;
place a grafting clip over the joined area to secure the graft;
Place the grafted tomatoes in a large transparent container so that the leaves do not touch the walls;
add a small amount of water to the bottom of the container to maintain high humidity;
close the lid and place the container in a warm spot (at least +20°C), protected from direct sunlight;
Lightly mist the grafted plants daily to maintain the required microclimate.
The tissues usually fuse within a week. After 4-5 days, reduce the misting and leave the lid open for a few hours a day to gradually acclimatize the grafted tomatoes to room air.
After about ten days, take the plants out of the propagator. Once you are sure the graft has successfully taken, use a disinfected scalpel to carefully cut the stem of the scion below the graft union, so it relies entirely on the powerful root system of the rootstock.